Version Control
Version Control
Section titled “Version Control”iSparkClaw AI Editor includes built-in version control for tracking changes and reverting to previous versions of your documents.
Git Status
Section titled “Git Status”The status bar shows the current version control state:
- Git indicator — Shows when Git is active
- Branch name — Shows your current branch (e.g., main, develop)
Initializing Version Control
Section titled “Initializing Version Control”When you create a new workspace, version control is set up automatically.
For existing projects:
- Click the Git button in the header
- Select Initialize Repository
- Version control is ready to use
Viewing History
Section titled “Viewing History”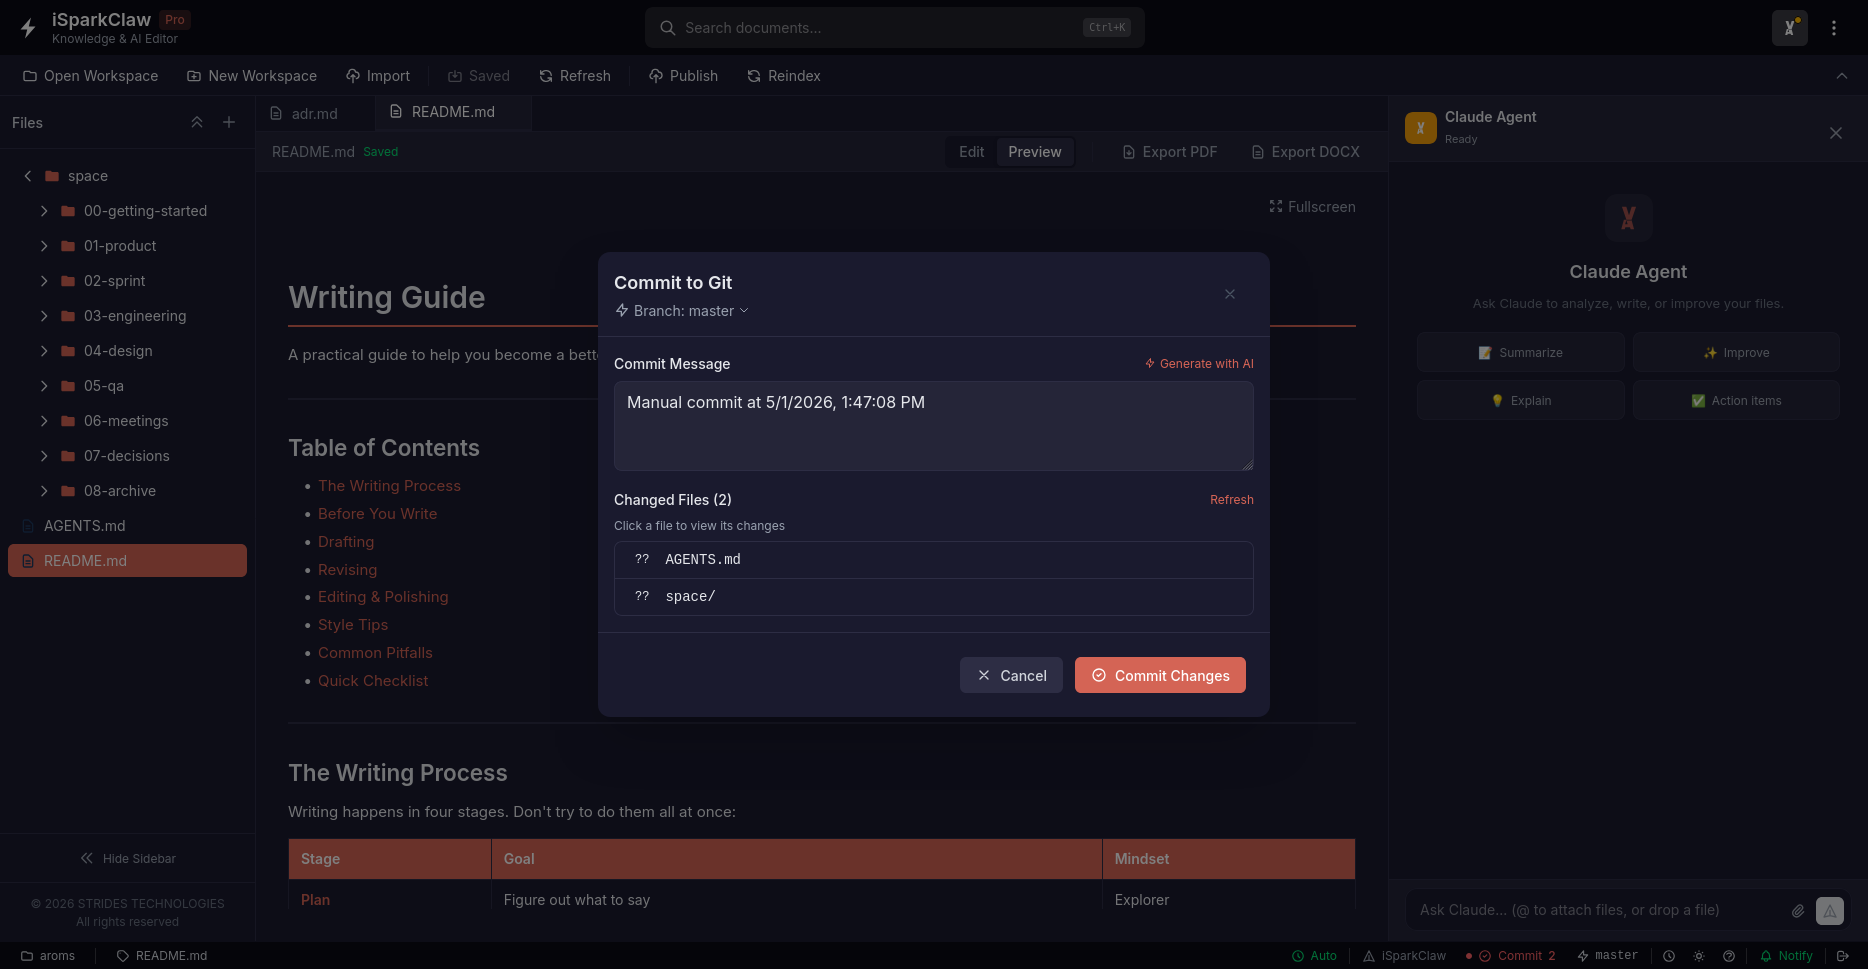
Click Git → History to see all changes:
Each entry shows:
- Date — When the change was made
- Description — What was changed
- Author — Who made the change
Creating Checkpoints
Section titled “Creating Checkpoints”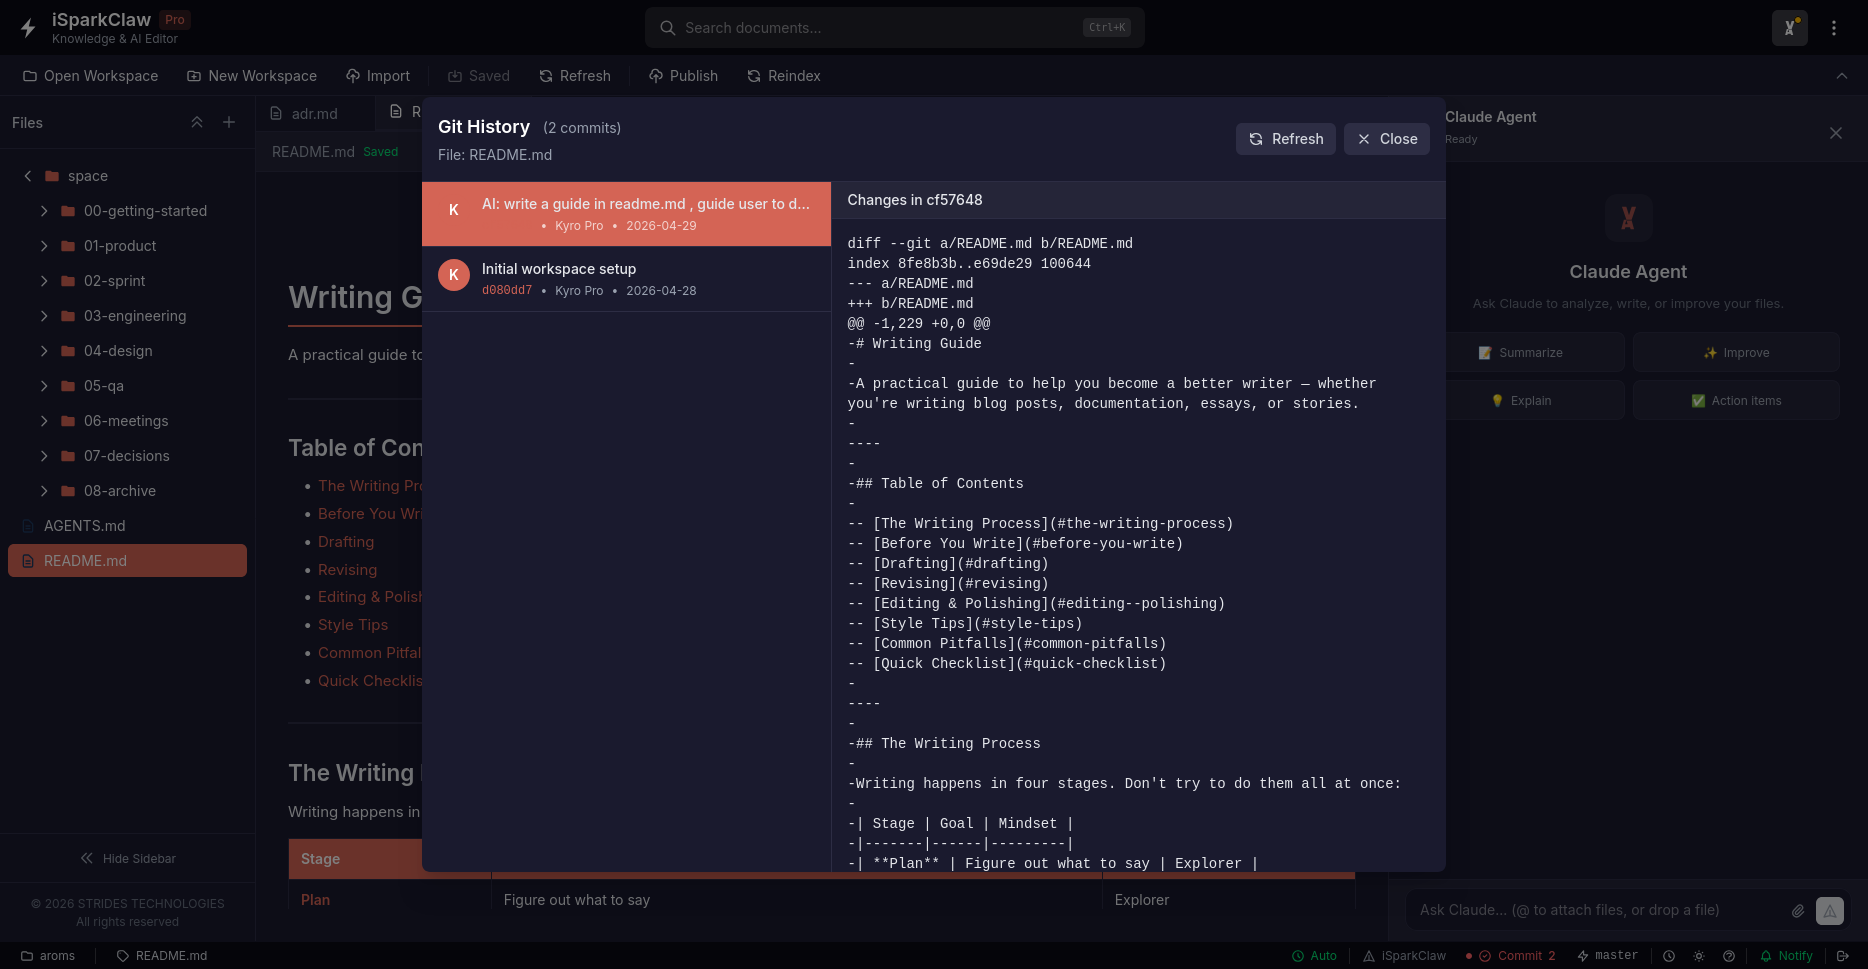
Save your progress by creating checkpoints (called commits):
- Click Git → Commit in the header
- Write a description of your changes
- Select which files to include
- Click Commit
Viewing Changes
Section titled “Viewing Changes”Select a commit and click Show Diff to see what changed:
- Green text — New content added
- Red text — Content removed
- White text — Unchanged content
Reverting Changes
Section titled “Reverting Changes”Restore Previous Version
Section titled “Restore Previous Version”- Select a commit in history
- Click Rollback
- Confirm the action
Note: This will restore the file to that point in time.
Safe Revert
Section titled “Safe Revert”Create a new commit that undoes changes:
- Select a commit
- Choose “Create revert commit”
- A new commit reverses the changes
This keeps your history intact.
Branching
Section titled “Branching”Branches let you work on new features without affecting the main work.
Creating a Branch
Section titled “Creating a Branch”- Click Git → Manage Branches
- Click Create Branch
- Enter a name (e.g., “new-feature”)
- Click Create
Switching Branches
Section titled “Switching Branches”- Select a branch from the list
- Click Switch
- Your work updates to that branch
Note: Save your work before switching branches.
Saving Work Temporarily
Section titled “Saving Work Temporarily”Stash lets you save work without committing:
- Click Git → Stash Changes
- Add a description
- Your changes are saved temporarily
To restore:
- Click Git → Pop Stash
- Your saved work returns
Best Practices
Section titled “Best Practices”- Create checkpoints before major changes
- Write clear descriptions for your commits
- Use branches for new features
- Stash work before switching branches